Training and Manuals
On this page you will find many of your ACT Aspire resources, including:
- Step-by-step instructions for the computer-based and paper-based assessment.
- Resources and manuals related to reporting, accessibilities, and accommodations.
- Links to ancillary and video resources such as Avocet and the Training Management System (TMS).
-
To see a global view of the entire assessment process, along with related TMS videos for each step, view the End-to-End Flowchart by clicking on the button below.
End-to-End Flowchart

Manuals
Click on a manual title to view or download on Avocet.
Step-by-Step Training Resources
Step-by-step instructions for setting up and administering the ACT Aspire paper-based and computer-based assessment.
Step 1: Organizational File (Org. File)
New Customers: Organizational File
After placing an order, the ACT Aspire team will use the information you have provided to upload an organizational file so you may access the Portal. The information in the file must be confirmed by the ACT Aspire Orders Department six weeks before testing. The ACT Aspire Orders Department will reach out to you to confirm, or may be reached at 855-730-0400 or orders@actaspire.org.
After the ACT Aspire Orders Department has confirmed the file, an invitation to the ACT Aspire Portal will be sent to individuals listed in the file.
Please note: If you have already submitted an organizational file for a previous administration or currently have access to the Portal, you do not need to resubmit a new organizational file.
Resources on Avocet
Both files are located under the “Organizational File” topic:
- Organizational File Layout
- Organizational Import Template (xlsx document)
Step 2: Delegating Administrative Tasks and Inviting Additional Users into the ACT Aspire Portal
After the initial Portal invitations for those listed on the Org. file have been accepted, users may choose to delegate test administration and set-up tasks to pertinent staff members such as:
- PNP entry
- Test session creation
The Administrator and Test Coordinator tenant roles have overarching access to school level information, while the Room Supervisor test session role needs to be invited into each test session after they are created. Having a clear local communication plan and test administrative roles established will help ensure a smooth testing experience.
Resources on Avocet
- Portal User Roles (Tenant and test session roles and responsibilities)
- Additional information regarding roles and responsibilities can be found in the (C) Checklist section and (M) Manuals sections on Avocet.
Step 3: Student Data File
- Reference the Student Data File Layout to populate the excel Student Data File Template.
- Please upload your Student Data File Template directly into the ACT Aspire Portal instead of emailing to ACT Aspire.
- Previous customers must use the SDU Rollover file to load students.
Please Note: Student Id's should be unique to that student and should not be changed from administration to administration
Resources on Avocet
Both files are located under the “Student Data File (SDU) File” topic:
- Student Data File Layout
- Student Data File Template (xlsx document)
Step 4: Accessibility and Accommodations
If a student requires a Personal Needs Profile (PNP) selected in the ACT Aspire Portal, please reference the Accessibility User’s Guide or the Portal User Guide for more information.
PNP information can be added individually by student or for multiple students simultaneously by using the PNP extract functionality.
Please Note: PNP information MUST be completed prior to placing students into Test Sessions.
Resources on Avocet
- Accessibility User’s Guide (Under the Accessibility & Accommodations topic)
- Personal Needs Profile (Under the Accessibility & Accommodations topic)
Step 5: Create Groups
Placing students into groups is an option you may take to help organize students into smaller sections before placing them into Test Sessions.
Students may belong to a maximum of 10 different groups. Some examples include:
- English Homeroom
- Math Advanced Placement
- Large Print Grade 5 Science
Reference the (G) Group section on Avocet to learn how to create groups prior to placing students into test sessions.
Resources on Avocet
- Groups topic (For creating groups prior to placing students into test sessions.)
Step 6: Technology Set-up and Configuration
Review Technical Requirements, Technical Bulletins, and Documentation
Before configuring your environment for computer-based testing, you should review technical requirements and documentation for TestNav 8 and ProctorCache. These items can be found in the Technology Set-up section of this site and on Avocet. Video resources for these items can be found in the Pre-Test Tech Readiness section of the Training Management System (TMS). The Technology Coordinator Checklist is a list of steps that Technology Coordinators can follow to assess readiness and prepare their environment for computer-based assessment. This checklist can be found in the C section of Avocet, and in the Other Technology Resources area at the bottom of the Technology Set-up section of this site.
In addition to the TestNav 8 and ProctorCache documentation, please review any technical bulletins that have been posted. Technical bulletins can be found on the News section of this site, and Avocet.
Configure Your Environment
Follow the configuration steps outlined in the Hardware and Software Requirements, Technology Coordinator Checklist, and ProctorCache Guides to configure your environment to deliver the ACT Aspire assessment. Identify and address any special considerations for your network. For example:
- Contact your ISP.
- Configure IPS and IDS devices.
- Configure restoration software.
- Plan and set-up bandwidth shaping and temporary testing rules for network devices.
ProctorCache
To help alleviate technical bandwidth strain on your local infrastructure you may choose to establish a computer to be a proctor caching machine.
After installing the software, set-up occurs in the ACT Aspire Portal at a building level, and uses an IP Address and the Port information of the designated machine.
Once you establish a proctor caching computer at an Organizational level the information can then be quickly applied to all test sessions created for that building.
Reference the Technology Set-up section of this site, and the Proctor Caching Quick Guide on Avocet to learn how to install the ProctorCache software and apply the settings within the Portal.
Assess Readiness with SystemCheck
Make use of SystemCheck to assess the readiness of your student testing devices. This Java-based web tool allows you to verify that a traditional workstation (desktop or laptop) meets the minimum browser, operating system, and Java requirements that are needed to run TestNav 8. You can also perform network connectivity tests between the student workstation, the ACT Aspire servers, and any proctor cache machines that you have set up.
Information on SystemCheck for TestNav 8 can be found on the Technology Set-up section of this site, on Avocet, and on the Training Management System.
Resources on Avocet
- ACT Aspire Landing Page - Technology Set-up Section (This section of the site holds information for TestNav 8, ProctorCache, and SystemCheck.)
- Technology Coordinator Checklist (A list of steps to follow to assess readiness, configure your environment, and launch the ACT Aspire assessment.)
- Hardware and Software Requirements (This document holds the hardware and software requirements for TestNav 8.)
- Proctor Caching Quick Guide (For information on how to install ProctorCache software and applying the settings within the Portal.)
Step 7: Test Session Set-Up
Separate test sessions need to be created for each Grade and Subject you are testing in your Organization. If a student is testing five subjects, you will need to create 5 different test sessions in the ACT Aspire Portal. Up to 200 students can be placed into a test session. Test Session creation is the indicator the system uses to determine which TestNav forms to launch.
When creating test sessions, the Portal will prompt you to provide dates, times, titles and test content selections for each test session you build. This is where you will reference your own Assessment Schedule and build your test sessions accordingly. ACT Aspire does not have any requirements for testing all subjects back-to-back, or in a particular order. As long as you test within our Testing Window, your schedule is a local decision.
Determining your organization’s Test Session naming conventions is critical. You will want to create names that are meaningful to your local plan.
Test Sessions will remain in a “Scheduled” status until the day and time you have set for each session to expire. We suggest creating a long window of test dates and start/end times to allow for make-up testing. If your assessment schedule is set to begin at 8:15am, you may want to build your test sessions to start at 7:00am to allow time to start all sessions that morning.
(Please Note: Users should update Daylight Savings Time settings to reflect their local time zone in the Organization Settings page)
Resources on Avocet
- “Tests” topic on Avocet (For additional information regarding Creating, Editing, and Adding students to Test Sessions.)
Step 8: Pre-Cache Computer-Based Test Content
You can now pre-cache the encrypted test content to a local server. Caching test content locally will help alleviate the strain of testing information passing back and forth to and from the TestNav servers.
Resources on Avocet
- Proctor Caching Quick Guide (To learn how to Pre-Cache test content.)
Step 9: Print Student Authorization Tickets
Each session will generate a unique set of student log-in credentials by student for accessing TestNav. These printed student log-in credentials are referred to as Authorization Tickets. You can print the tickets at a building, test session or individual student level.
Authorization Tickets must be kept in a secure location prior to testing and each ticket is unique to each student.
If a student is testing five subjects, they will need five different tickets printed. You must hand out a personalized ticket to the student noted specifically on the ticket before starting each subject. Do not hand out all tickets for all subjects to a student at one time. Tickets may be used as scratch paper.
Resources on Avocet
- Authorization Tickets topic (To learn more about your printing options.)
Step 10: Start All Test Sessions in the Portal
On the day and time that your testing is scheduled to begin, your test sessions in the Portal will move into a “Ready” status. This indicates the system is ready for the session to begin.
To start a single test session:
- Click on “Ready”
- Choose “Start Test”
To start multiple test sessions:
- On the "My Test Sessions" screen select the "Action" icon.
- Select "Start Test Sessions" from the dropdown menu.
- Select the sessions you would like to start and click "Submit".
All test sessions for computer-based testing MUST be started in the Portal prior to students logging into TestNav. Failure to do so will cause the students to receive an error on their TestNav screen.
Please allow enough time the morning of your assessment for this process to take place. If your assessment schedule is set to begin at 8:15am, you may want to build your test sessions to start at 7:00am to allow time to start all sessions in the Portal that morning.
Resources on Avocet
- Start a Test topic (To learn more about starting test sessions in the Portal.)
Step 11: Administer the Test
After you’ve started the test sessions on the day of testing, you will:
- Hand out authorization tickets per subject and student
- Read the test directions provided in the Room Supervisor Online Testing Manual
Students will:
- Use the Authorization Ticket credentials to log into TestNav
- Complete their assessments
When complete, you will collect all authorization tickets and scratch paper before students dismiss from the testing room.
Resources on Avocet
- Manuals topic (For the Test Coordinator and Room Supervisor manuals.)
Step 12: Post-Test Clean-Up
After all students have completed each of their tests (including make-ups) and you have collected all the Authorization Tickets and scratch paper, you will need to go into the Portal and enter any testing irregularities that occurred and close all test sessions.
Resources on Avocet
- Irregularities topic (To learn how to enter all Irregularities into the Portal prior to closing test sessions.)
- Close a Test topic (To learn how to close all your test sessions in the Portal.)
Step 1: Organizational File (Org. File)
New Customers: Organizational File
After placing an order, the ACT Aspire team will use the information you have provided to upload an organizational file so you may access the Portal. The information in the file must be confirmed by the ACT Aspire Orders Department six weeks before testing. The ACT Aspire Orders Department will reach out to you to confirm, or may be reached at 855-730-0400 or orders@actaspire.org.
After the ACT Aspire Orders Department has confirmed the file, an invitation to the ACT Aspire Portal will be sent to individuals listed in the file.
Please note: If you have already submitted an organizational file for a previous administration or currently have access to the Portal, you do not need to resubmit a new organizational file.
Resources on Avocet
Both files are located under the “Organizational File” topic:
- Organizational File Layout
- Organizational Import Template (xlsx document)
Step 2: Delegating Administrative Tasks and Inviting Additional Users into the ACT Aspire Portal
After the initial Portal invitations for those listed on the Org. file have been accepted, users may choose to delegate test administration and set-up tasks to pertinent staff members such as:
- PNP entry
- Test session creation
The Administrator and Test Coordinator tenant roles have overarching access to school level information, while the Room Supervisor test session role needs to be invited into each test session after they are created. Having a clear local communication plan and test administrative roles established will help ensure a smooth testing experience.
Resources on Avocet
- Portal User Roles (Tenant and test session roles and responsibilities)
- Additional information regarding roles and responsibilities can be found in the (C) Checklist section and (M) Manuals sections on Avocet.
Step 3: Student Data File
- Reference the Student Data File Layout to populate the excel Student Data File Template.
- Please upload your Student Data File Template directly into the ACT Aspire Portal instead of emailing to ACT Aspire.
- Previous customers must use the SDU Rollover file to load students.
Please Note: Student Id's should be unique to that student and should not be changed from administration to administration
Resources on Avocet
Both files are located under the “Student Data File (SDU) File” topic:
- Student Data File Layout
- Student Data File Template (xlsx document)
Step 4: Accessibility and Accommodations
If a student requires a Personal Needs Profile (PNP) selected in the ACT Aspire Portal, please reference the Accessibility User’s Guide or the Portal User Guide for more information.
PNP information can be added individually by student or for multiple students simultaneously by using the PNP extract functionality.
Please Note: PNP information MUST be completed prior to placing students into Test Sessions.
Resources on Avocet
- Accessibility User’s Guide (Under the Accessibility & Accommodations topic)
- Personal Needs Profile
Step 5: Create Groups
Placing students into groups is an option you may take to help organize students into smaller sections before placing them into Test Sessions.
Students may belong to a maximum of 10 different groups. Some examples include:
- English Homeroom
- Math Advanced Placement
- Large Print Grade 5 Science
Reference the (G) Group section on Avocet to learn how to create groups prior to placing students into test sessions.
Resources on Avocet
- Groups topic (For creating groups prior to placing students into test sessions.)
Step 6: Test Session Set-Up
Separate test sessions must be created for each Grade and Subject you are testing in your Organization. If a student is testing five subjects, you will create 5 different test sessions in the ACT Aspire Portal. Up to 400 students can be placed into a test session. Test Session creation is the indicator the system uses to determine which grades and subjects of forms and answer documents need to be packaged and shipped.
When creating test sessions, the Portal will prompt you to provide, dates, times, titles and test content selections for each test session you build. This is where you will reference your own Assessment Schedule and build your test sessions accordingly. ACT Aspire does not have any requirements for testing all subjects back-to-back, or in a particular order—As long as you test within our Testing Window, your schedule is a local decision.
Determining your organization’s Test Session naming conventions is critical. You will want to create names that are meaningful to your local plan.
Please note: for paper customers, only the first 6 digits of the test session name will appear on your student’s personalized answer documents. We suggest you pre-determine a code that works best for your organization. (E.g., JDG4E = Jane Doe Grade 4 English.)
Resources on Avocet
- “Tests” topic on Avocet (For additional information regarding Creating, Editing, and Adding students to Test Sessions.)
Step 7: Receiving and Organizing Test Materials
Please note: Personalized paper materials are generated the Monday after the session setup window closes. Please view the Summative Schedule on Avocet.
Save the boxes that your materials arrive in, as you will use them to pack and return your materials after your testing is complete. All test materials must be kept in a secure location until the day of testing.
Answer Documents
For district and state-level customers: Answer Documents (ADs) will be plastic shrink-wrapped, sorted alphabetically by last name and test session, boxed by school, and shipped to district and state-level customers.
For school-level customers: ADs will be plastic shrink-wrapped, sorted by test session, boxed by school and shipped to school.
There will be one AD for each subject the student is taking. (E.g., If a student is taking English, Reading and Math, that student will receive three separate ADs.)
Test Books
Test Books (TBs) will be plastic shrink-wrapped in packs of 5 and are not personalized to a specific student. Test Books should be randomly distributed in the testing room. Each TB will have a unique security barcode on the spine of the book. Test Books are tracked and must ALL be returned after your testing window has closed.
There will be one TB for each subject the student is taking. (E.g., If a student is taking English, Reading and Math, that student will receive three separate TBs.)
Note that each Test Book cover lists a unique form code that maps back to section D on each answer document. The student’s information and the form code MUST be populated prior to returning any answer document to ensure processing and scoring can be completed.
Resources on Avocet
- PBT Summative Schedule
- Answer Document Layout topic (Identifies each section on the personalized ink-jetted answer document. Please make note of where your 6 digit test session naming convention appears for quick organizing upon receipt.)
Step 8: Start All Test Sessions in the Portal
On the day and time that your testing is scheduled to begin, your test sessions in the Portal will move into a “Ready” status. This indicates the system is ready for the session to begin.
To start a single test session:
- Click on “Ready”
- Choose “Start Test”
To start multiple test sessions:
- On the "My Test Sessions" screen select the "Action" icon.
- Select "Start Test Sessions" from the dropdown menu.
- Select the sessions you would like to start and click "Submit".
Please allow enough time the morning of your assessment for this process to take place. If your assessment schedule is set to begin at 8:15am, you may want to build your test sessions to start at 7:00am to allow time to start all sessions in the Portal that morning.
Resources on Avocet
- Start a Test topic (To learn more about starting test sessions in the Portal.)
Step 9: Administer the Test
After you’ve started the test sessions on the day of testing, you will:
- Hand out the student-specific answer documents per subject
- Randomly distribute test books to students
- Read the test directions provided in the Room Supervisor Paper Testing Manual
- Students will then begin and complete their assessments
Sessions are specifically timed by subject; We provided a location for you to record your testing times after each subject in the Room Supervisor manual.
Be sure each student has their name on the answer document and the Form Code gridded before dismissing the room.
Resources on Avocet
- Manuals topic (For the Test Coordinator and Room Supervisor manuals.)
Step 10: Post-Test Clean Up
After all students have completed each of their tests (including make-ups) and you have collected all the test materials and scratch paper, you will need to go into the Portal and enter any testing irregularities that occurred and close all test sessions.
Resources on Avocet
- Irregularities topic (To learn how to enter all Irregularities into the Portal prior to closing test sessions.)
- Close a Test topic (To learn how to close all your test sessions in the Portal.
Step 11: Returning Answer Documents and Test Books
When returning test materials, please be sure to:
- Return all materials within 48 hours of testing being complete.
- Return all materials in the boxes the materials arrived in.
For Answer Documents
Using your ACT Aspire supplied return labels, please be sure to:
- Apply a lavender label and a white UPS label that states the “2nd Day” shipping method on each box of answer documents
-
Number each box using the lavender label so we can verify your full shipment is received.
- Please use the numbering convention: 1 of n, 2 of n, etc.
- You do not need to supply an answer document count per box, or group the documents in any required fashion. Instead, please make sure all documents are accounted for locally before returning for scoring.
- Please call UPS to schedule a pick-up that is convenient for you and is within 48 hours of your testing window being complete.
For Test Books
- Apply a yellow label and a white UPS label that states “Ground” shipping method on each box of test books.
-
Number each box using the lavender label so we can verify your full shipment is received.
- Please use the numbering convention: 1 of n, 2 of n, etc.
- You do not need to supply a test book count per box, or group the test books in any required fashion. Instead, please make sure all test books are accounted for locally before returning for security resolution.
- Test books are serialized, tracked when shipped to you, and highly secure; you will be required to locate any missing test books that are not returned. Please call UPS to schedule a pick-up that is convenient for you within 48 hours of your testing window being complete.
Resources on Avocet
- Manuals topic (For the Test Coordinator and Room Supervisor manuals.)
- Returning Test Materials
ACT Aspire Knowledge Base and Training Opportunities
ACT Aspire Summative Knowledge Base - Avocet and Training Management System
Two main knowledge and training resources for the ACT Aspire assessment are Avocet and the Training Management System.
Avocet
http://actaspire.avocet.pearson.com
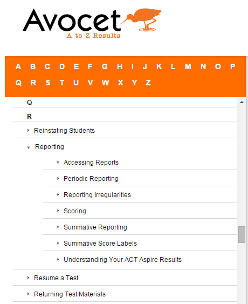
- Indexed and searchable list of manuals, guides, checklists, and more.
- View portions of manuals and resources online, download local copies, or print.
Training Management System
https://actaspire.tms.pearson.com
- Register and access with your email address to track your training progress and view training transcripts.
- Bite sized training modules covering a variety of subjects and topics.
- Topics cover both summative and periodic assessments.
- Modules are self-paced and content is searchable.